If you've been researching ways to lower your energy bills and improve comfort in your Hawthorne-area home, you've probably come across the terms "attic air sealing" and "attic insulation" used together. That's not a coincidence — these two services are designed to complement each other, and performing one without the other leaves a significant portion of potential energy savings on the table. This guide explains both processes in plain language and shows you what a complete attic upgrade looks like from start to finish.
Why the Attic Is the Most Important Place to Start
Heat moves in three ways: conduction (through solid materials), convection (through air movement), and radiation (through electromagnetic waves). Your attic is exposed to all three mechanisms simultaneously. On a hot Hawthorne summer day, the roof deck can reach 150°F or more, radiating heat down into the attic space. That heat then conducts through the attic floor into your living spaces, while hot attic air also presses down on every unsealed gap and bypass in the ceiling. Addressing the attic first delivers the greatest return on investment of any home energy upgrade.
Step One: Attic Air Sealing
Before any insulation is added or replaced, hidden air leaks in the attic floor must be sealed. In a typical Hawthorne home, conditioned air escapes through dozens of small openings — around recessed light cans, plumbing vent stacks, electrical wire penetrations, HVAC duct boots, and open cavities at the top plates of interior walls. Insulation alone does not stop this air movement; it simply slows conductive heat transfer. Our attic air sealing service targets every one of these bypasses using two-part expanding spray foam, fire-rated foam for fixtures, and elastomeric caulk for smaller gaps and seams.
Homeowners in Inglewood, Lawndale, and Alondra Park are often surprised by how many unsealed penetrations exist in their attics — especially in homes that have been remodeled over the decades, where new plumbing and electrical runs were added without sealing the new openings. A thorough air sealing pass can reduce whole-house air leakage by 20–40% in older South Bay homes.
Step Two: Removing Old or Damaged Insulation
Not every attic upgrade requires removing existing insulation first. If your current insulation is in good condition, clean, and free of pest contamination or moisture damage, we can often add new material directly on top. However, if your attic shows signs of rodent activity, water intrusion, mold, or severe compression, a full removal is the right starting point. Our insulation removal service uses powerful HEPA-filtered vacuum equipment run directly from your attic hatch to an exterior collection unit, keeping dust and debris out of your living areas throughout the process.
After removal, we document the clean attic with photos and inspect for pest entry points, moisture sources, and any structural concerns — giving you a complete picture of your attic's condition before we proceed with new installation.
Step Three: Installing New Insulation
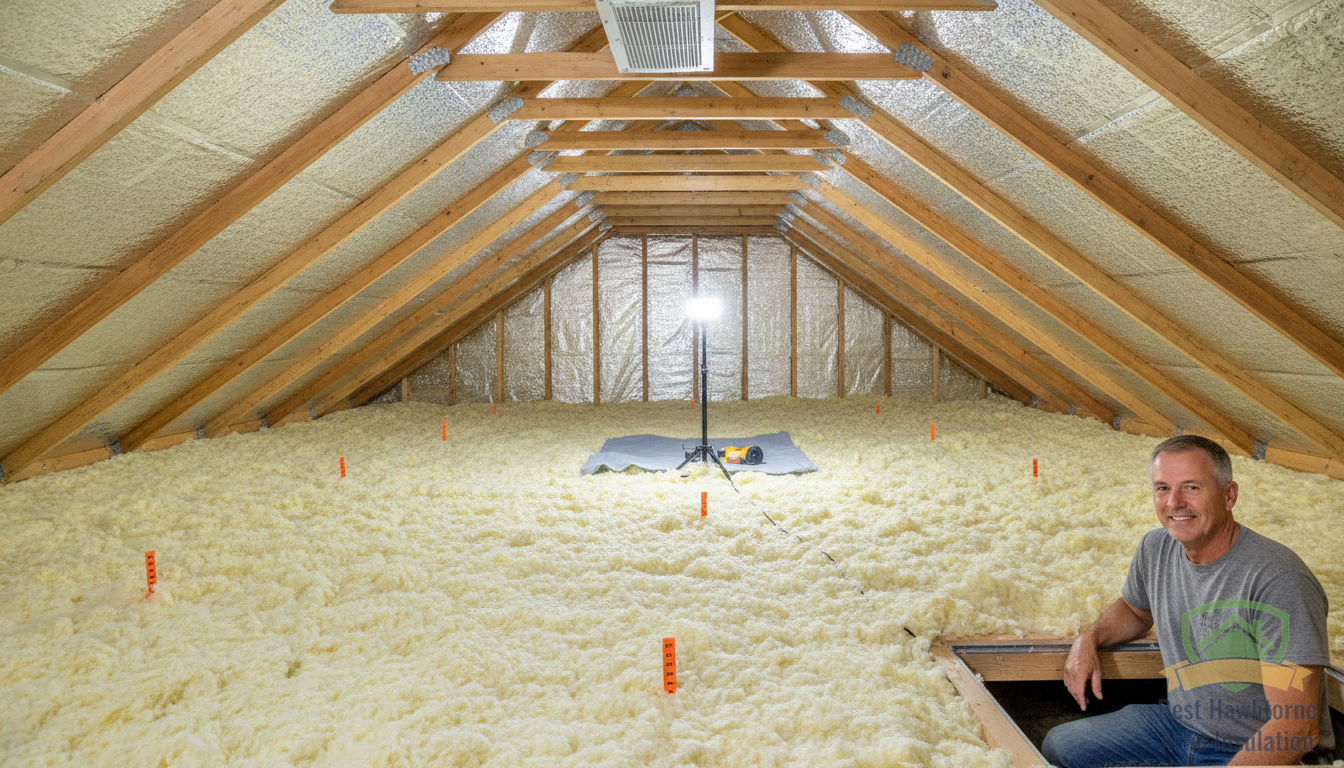
With air sealing complete and any old material removed, your attic is ready for fresh insulation. For most Hawthorne homes with standard vented attics, we recommend blown-in fiberglass or cellulose insulation installed to a minimum of R-38 as required by California's Title 24 energy code, with R-49 to R-60 delivering the best long-term return on investment in the South Bay climate. Our professional blowing equipment distributes material evenly across every square foot of attic floor, including hard-to-reach areas under eaves and around obstructions.
For homeowners with unvented attic assemblies, cathedral ceilings, or specific moisture concerns, our spray foam insulation service provides a seamless, airtight alternative that combines insulation and air sealing in a single application. Our team will assess your attic type during the initial inspection and recommend the most appropriate product and approach for your specific home.
In every case, our full attic insulation installation service includes a post-installation walkthrough where we verify depth and coverage with you before we leave the job site.
Step Four: Adding a Radiant Barrier (Highly Recommended in Southern California)
Even a fully air-sealed, properly insulated attic can still accumulate excessive heat on a Hawthorne summer day because of radiant energy pouring off the hot roof deck. A reflective radiant barrier installation on rafter undersides reflects this energy before it can warm your insulation, reducing attic temperatures by 20–30°F and cutting cooling loads by 5–10%. This is especially valuable in homes where HVAC ducts run through the attic, since those ducts lose a significant portion of conditioned air energy when surrounded by superheated air.
How Much Can You Save?
The exact savings depend on your home's size, current insulation levels, duct system configuration, and HVAC equipment efficiency. However, the Department of Energy estimates that air sealing and insulation upgrades can reduce heating and cooling costs by 15–30% in typical homes. For a Hawthorne homeowner spending $200–$300 per month on electricity during summer, that represents real, recurring savings that compound every year.
Serving Hawthorne and All South Bay Communities
Best Hawthorne Attic Insulation performs complete attic air sealing and insulation upgrades for homeowners throughout Hawthorne, Lawndale, Lennox, Inglewood, Westmont, and Alondra Park. Our team is available Monday through Sunday, 8:00 AM to 6:00 PM, and we offer free attic assessments with every project inquiry. Call us at (310) 982-2205 or visit our contact page to get started with a no-pressure evaluation of your home's attic today.
Need Service?
Call +13109822205 or fill out our online form for a free, no-obligation quote.
Request Free Quote